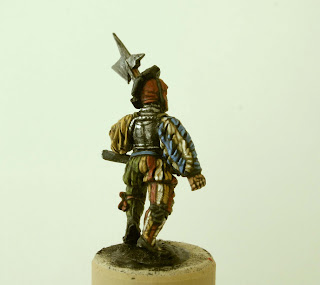
Over the past few months I have been working upon some Landsknechts or rather Lansquenets in French service.
Each time I work upon a unit of Landsknechts I learn something new or apply a different approach and this is no exception. Last time I got to grips with Pinterest which really helped for colour combinations both from contemporary sources and re-enactors which you can see on these two boards that I have put together;
In tackling this unit the challenge was to make the figures to be clearly in French service and in some way subtly different from their Imperial counterparts. I approached this with the use of white cross and fleur de lys field signs and the banners to emphasise a sense of unit identity.
I paint all of the standing Landsknechts in my collection with field signs and appropriate banners and leave those in advancing poses and arquebusiers neutral so that they can be easily interchanged.
With Landsknechts colour is key but this is by no means a straightforward task if you want to achieve convincing results. If you're new to this blog have a read through the pages for my experience and advice upon how to paint these figures.
On to the figures, first up are the standard bearers or Fahnriche
This Landsknecht carries a simple banner of the cross of St Denis on a striped yellow and red background to reflect Louis XII's livery. He wears a Wappenrock (war coat) for which I was keen to apply some inspiration found in a series of coloured paintings that heavily feature the garment. Here's some examples and there are more on the Pinterest link above from which you can also view the original source;
This half plain / striped design is also apparent in the French / Italian cavalry in lower right of this depiction of the Battle of Marignano, I'll repeat this when I next work upon some cavalry.
The second banner bearer is a heavily armed infantryman in yellow clothing to match the banner and a cross of St. Denis painted on his breastplate. When painting I use a dull brown wash after the base colour to achieve a slightly earthy tone, I vary this for some colours in an attempt to really bring them out; for yellow I use a 50/50 dark leather / dull brown wash which I find works as a good base for ochre. For Red I add tan and dark red to the wash and for blue I wash with a mix of dark blue, black and dark brown. On the first standard bearer I waited for the blue wash to dry before doing the brown wash for the rest of the figure to avoid the washes bleeding.
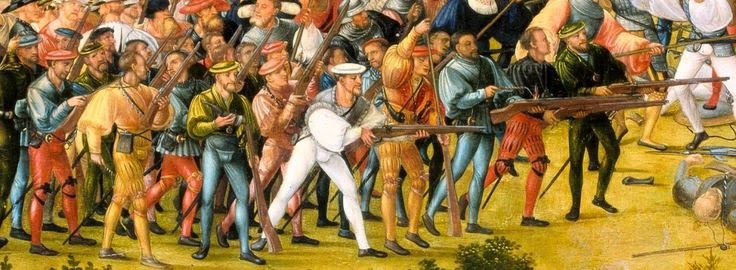
I took inspiration from the Pavia Tapestry for the banners which itself is well worth a close study. The tapestry or rather series of tapestries were completed by Bernard van Orley in Brussels during 1528-31, from the series a number of French banners within the infantry can be easily identified and follow a theme of either a plain cross of St Denis on a yellow, blue or red background or upon a striped background as can be seen here;
This theme with some variation is typical of the first quarter of the sixteenth century as you can see between the Marignano (1515) & Pavia (1525) images above.
The banners were created as black and white drawings using Photoshop and printed onto self adhesive paper. I painted them in the usual 3 stage method then cut out and carefully folded with highlights painted onto the creases thereafter.
The pennons were a great find from the Front Rank 18th Century equipment range, a Fleur de lys with tassels and cravat really help to emphasise unit identity and seemed suitably date neutral to use for this period;
The remainder of the command group for the first base are the lieutenant and two doppelsoldners with zweihander and halberd;
The lieutenant wears a parti-colour coat as described above with a fine red hat and shoes, I also painted a small cross brooch on the underside of his hat.
Aside him his guards are a well armoured halberdier and a rather impregnable looking chap in half armour wielding a formidable two handed sword. The latter figure features in Steel Fist Miniatures range of 16th century dismounted knights, they're very clean casts and the sculptor has been at considerable pains to ensure the accuracy of source material. They also blend rather well with this range of Foundry Miniatures.
For the second base we have a fifer, commander and another doppelsoldner with a formidable zweihander.
On to the men in the ranks;
Most of these were inspired by the aforementioned Pinterest galleries with a couple of my own combinations thrown in. You can batch paint and mix if you're doing a lot but I've always done them as individuals and checked what colours I've used before embarking on a new figure.
In addition it's good to have a couple in fairly basic colours then a mid range and then a couple in a riot of colour, remember that some may be obscured by the flags so have a few trial runs at how you want to base the unit.
On that subject as I've based these on a single 120x60mm base it's quite tricky to apply the basing process, particularly the filler when you start. You can either apply the figures to the base in stages or just be patient with the filler, I use both a standard and very narrow palette knife to help with this. I also blend filler with acrylic paint mixed to the same colour as the basing paint, that way if the base gets chipped it doesn't stand out as much as plain white filler.
There's no such thing as too many Landsknechts !
Bye for now
Stuart


